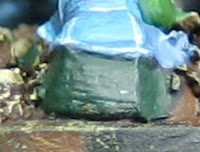
Backpacks/Gloves/Hooves
I needed a way to bring in Citadel Foundation Color (CFC) Orkhide Shade into my rank and file. The Orkhide Shade will play an important role in the disruption camo pattern on my vehicles so I wanted it to carry over into other areas of my army.


I made sure I had a good coat of the Orkhide Shade laid down with my Basecoat brush. I didn't thin it with anything and was happy with the way it coated. I switched up to Standard brush and painted the edges and raised areas with VGC Mutation Green.

On the next step I couldn't get my standard brush to hold the point I wanted. At that time the reason I had disavowed Citadel brushes all came back to me. I remember being frustrated at them because, for whatever, reason, I couldn't keep the point I had on them. Again, I am painting with a brush set released years ago so I cannot speak for the new brushes. Digging around I found a Windsor Newton Series 7 0 lying around. This brush was far smaller than I wanted to use but I didn't have much choice. My Citadel brushes are great for basing and larger detail, but they are getting benched for the fine stuff. With that Series 7 o I hit all the highest points and corners with VGC Goblin Green.

Going forward I am going to find another color for the final highlight. The VGC Goblin Green is too prevalent in the armor, and the hands don't look at all like they were based another color. I am worried that the same thing will occur on larger level for my vehicles. I may devise another final highlight for this color, I using the next five fire warriors to experiment.
The Guns and Vents
For the parts of the pulse rifles that were not green I just painted them black. I also did the venting on the backpack as black.
 With the Standard brush I did the first highlight with a 1:1 VGC Black/VGC Cold Gray mix, thinned with water and matte medium. After that I did another highlight of 1:1 VGC Cold Gray/VGC Stonewall Gray at the higher areas. I am not really going to expand on this much further because I will not be doing it going forward. I am too fond of the black build using P3 Coal Black and P3 Frostbite in various ratios. I will expand on that black build in another post.
The Gold
I used gold for the ball thing in the pulse rifle as well as the tip of the antennas on the helmets.

 |
| From Mars Project Blog |
Using pretty watery metallics has had some very good success with me so I will spend a few extra mins on the metallic steps while I am painting to make sure they look right. I laid down a base of VGC Glorious Gold first. Once that was dry I washed all my golden areas with Citadel Wash Devlan Mud a few times, making sure to get that line that bisects the ball-thing clearly defined.
 |
| From Mars Project Blog |
Next I brought up the raised areas with some VGC Polished Gold.
 |
| From Mars Project Blog |
And lastly, grabbed my Series 7 o and a watery mixture of 1:1 VGC Polished Gold and VGC Silver for the highest areas for the final look.
 |
| From Mars Project Blog |
All that is left now are squad markings, glow effects, and finishing the basing, which will be gotten to in the next post.
Thanks for reading,
T

No comments:
Post a Comment